
This page last updated: September 4th, 2013
July, 2013: I feel like I overbuilt my first Hackintosh; 7 empty PCI slots and a case that was not fun to move around, due to it's size. I wanted something a little smaller and more portable. Also, I was just itching for a chance to try out this whole Hackintosh thing again. :)
These specific resources helped me out with this build:
- ASRock Z77E-ITX | Core i7-3770K | EVGA GTX 570HD (tonymacx86.com)
- Guide: 10.8 on ASRock Z77E-ITX + HD 4000 graphics (insanelymac.com)
| Item | Cost | |
|---|---|---|
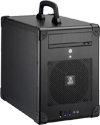 |
I describe the case as "a spy's suitcase". The handle is awesome, as are the heavy-duty corner protectors. It only has one PCI slot (as opposed to 7 in my previous build), but since I don't need dedicated graphics, that was just fine. I had initially considered the BitFenix Prodigy, but was worried about reports that the plastic case didn't have that "quality feel" to it. |
$178.98 |
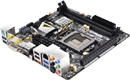 |
I needed something that would drive my 30" Dell 2560x1600 display using DisplayPort. The DVI port was great for my secondary monitor, and I could use the HDMI port for connecting to TVs on the road. Other Mini-ITX motherboards out there (notably the Gigabyte GA-H77N-WIFI) did not appear to offer a video output capable of more than 1920x1200… UNACCEPTABLE!!! |
$139.99 |
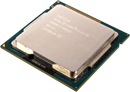 |
Processor: Intel Core 3.4 GHz i5-3570K "Ivy Bridge" Quad-Core Processor I could have gone for the faster i7-3770K, but I decided to skimp and went with the i5-3570K and save $60. In hindsight, I think I should have just gone with the 3770K. |
$219.95 |
RAM: Crucial Ballistix Sport 1600MHz DDR3 16 GB (2x8GB) I saw a $25 discount from Newegg and snatched 'em up. Going from 32 GB to 16 GB has been painful on only one occasion. Mini-ITX motherboards (including mine) seem to max out at 16 GB, so I was limited. |
$108.99 | |
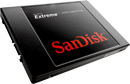 |
Boot Drive: 120 GB SanDisk Extreme SSD If you haven't experienced solid state boot times and application launch times, you will be blown away. SSD is the only way to go. |
$100.91 |
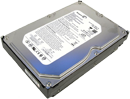 |
Data Drive: 3 TB Seagate Barracuda ST3000DM001 (7200 RPM) The one downside to SSDs is the cost per GB is quite high as compared to traditional hard disk drives (HDDs). For very large media libraries (iTunes, iPhoto) that don't need split-second response time, HDDs are still the way to go. I was able to re-use my data drives from my first Hackintosh. |
$124.32 |
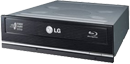 |
Optical Drive: LG BD / DVD / CD Writer WH12LS30 SATA For ripping DVD and Blu-Ray discs to iTunes and streaming to an Apple TV. I re-used this drive from my first Hackintosh. |
$75.99 |
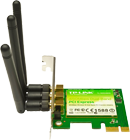 |
Wi-Fi: TP-Link PCI Express Wifi Adapter TL-WDN4800 This card is natively recognized as an AirPort Extreme card. It is very convenient to get online via Wi-Fi before your ethernet port is working! It just works. Downside is the three antennas that are poking out the back of your case, and the fact that it will be occupying your only PCI slot. |
$42.99 |
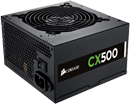 |
Power Supply: Corsair CX500M Modular I was mainly looking for a cheaper, lower power, modular PSU. And this is what I found. Going modular makes the installation cleaner. |
$59.99 |
 |
Operating System: Apple OS X 10.8.4 Mountain Lion Because Windows sucks. |
$19.99 |
 |
Keyboard: Apple Wired Keyboard You could get away with any old USB keyboard (including Windows-centric ones) but Apple makes a solid keyboard with keys that make sense with OS X. Just make sure you get the one with the number pad (unless you hate number pads for some reason). You must use a wired USB keyboard (i.e. NOT Bluetooth) to set up things like your motherboard. |
$49.00 |
 |
Mouse Any generic USB mouse will do. I have always hated Apple mice, even the latest Magic Mouse. I prefer Logitech brand mice. |
$15.00 |
 |
Monitor Not everyone will want to spend over $1,000 on a 30" display like me, so you should probably source your own DisplayPort, DVI or HDMI equipped monitor. |
|
| Total | $1,136.10 |
Jump to…
- Motherboard Configuration
- OS Installation
- OS Post-Installation
- Fix: Ethernet Port
- DSDT Installation and Editing
- Fix: USB 2.0 Devices in USB 3.0 Ports
- Fix: Automatic Sleep
- Fix: Orange Hard Drive Icons
Motherboard Configuration
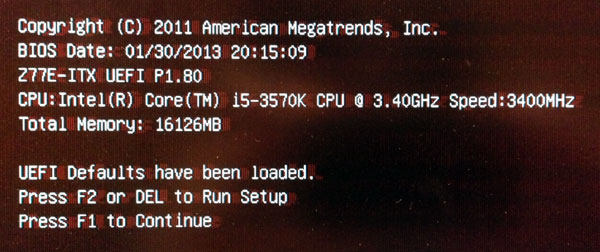
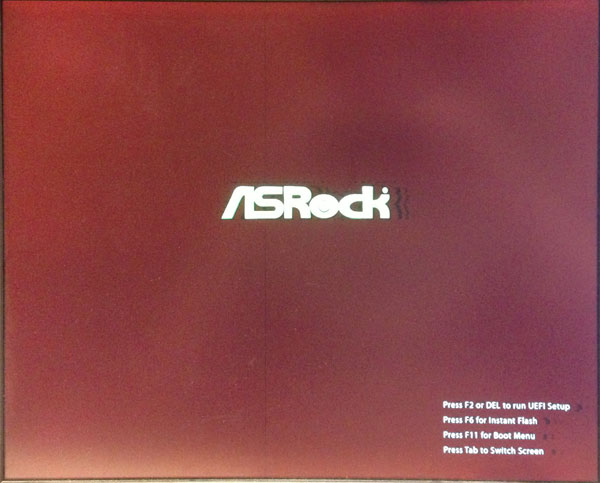
- After assembling your components, turn the computer on via the power button on the front. Make sure the switch on the power supply is turned on too. You should see something like this:
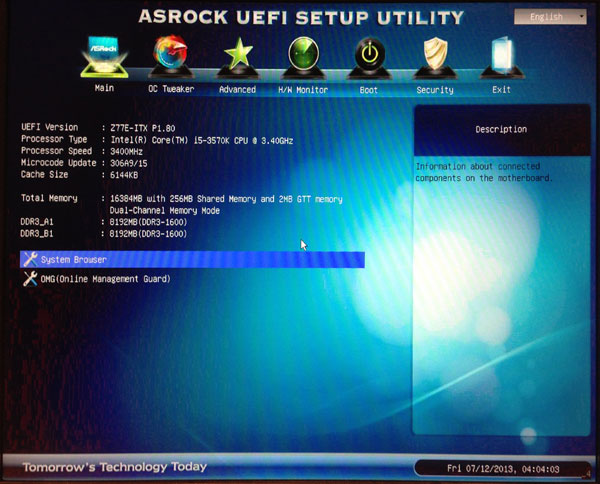
- Press F2 to enter the ASRock UEFI Setup Utility
- We will be loading custom ASRock firmware to solve sleep / wake issues, sources from Buckeyes1995. Copy the Z77E.180 file onto a USB thumb drive formatted as FAT32. Plug the thumb drive into a USB 2.0 port.
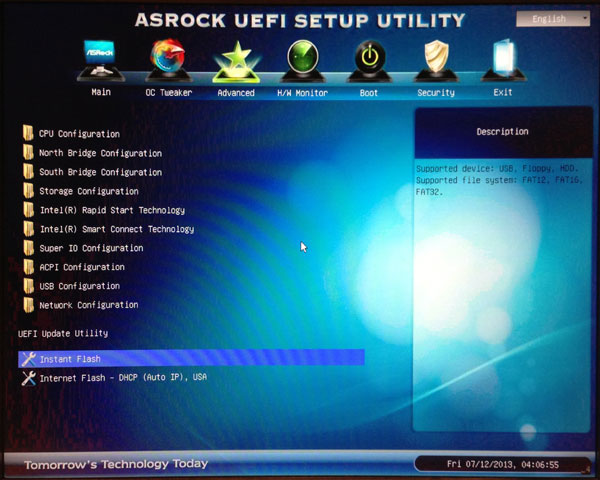
- Switch to the Advanced section and choose the Instant Flash option near the bottom:
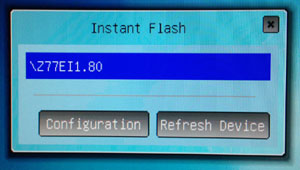
- You should see a prompt similar to the one below. Choose the Z77E.180 file from the list and press Return to start the flash.
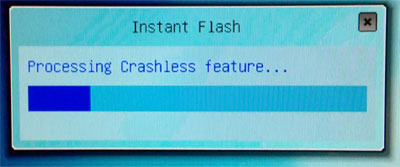
- The custom firmware is loaded:
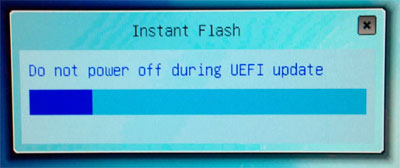
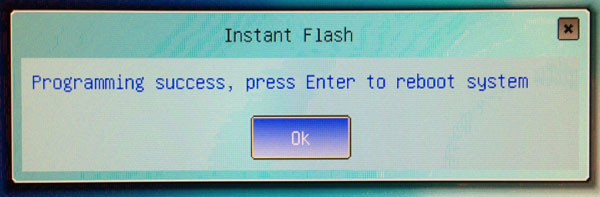
- When the flash is completed, you should see this message:
- Reboot, and press F2 immediately when you see the ASRock logo to enter the UEFI Setup again:
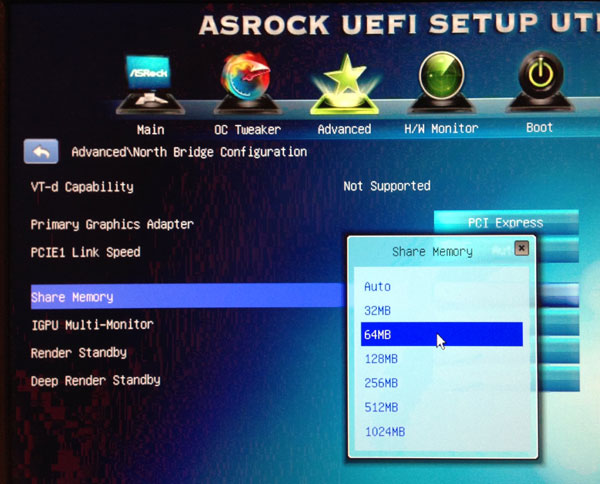
- Switch to the Advanced section and choose the North Bridge Configuration. Choose the Share Memory option and set to 64MB:
- Press the Escape key and arrow over to the Exit option. Save and exit to reboot.
OS Installation
- Prepare a boot disk using a USB thumb drive that is 8 GB or larger. I used myHack 3.2 BETA 8. myHack instructions:
http://myhack.sojugarden.com/guide/ - Insert USB boot disk into a USB 2.0 port (not USB 3.0!) and startup computer.
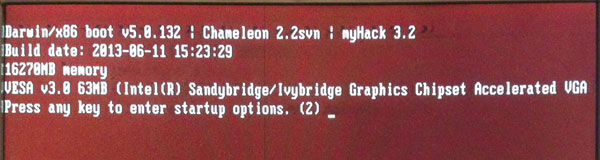
- You should be greeted with the myHack boot screen. Either let the startup option timeout to boot from the USB drive or press any key to choose the myHack USB disk.
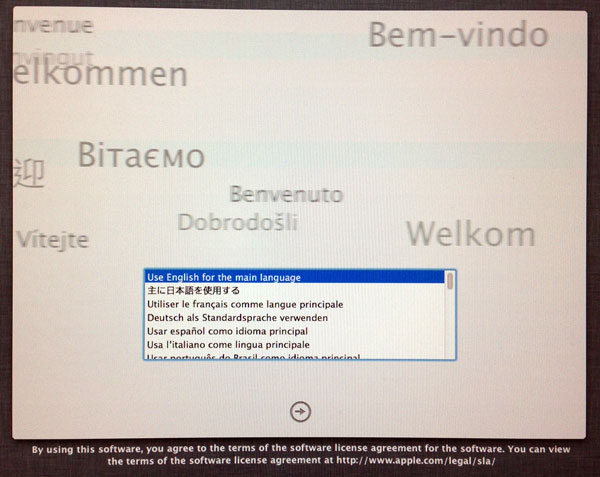
- The OS X Mountain Lion installer should launch, prompting you to choose a language:
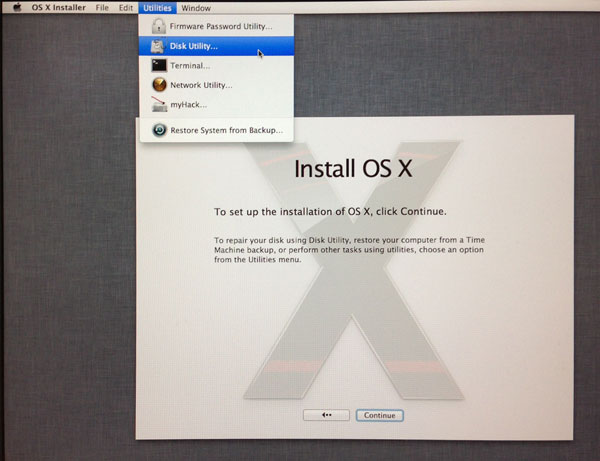
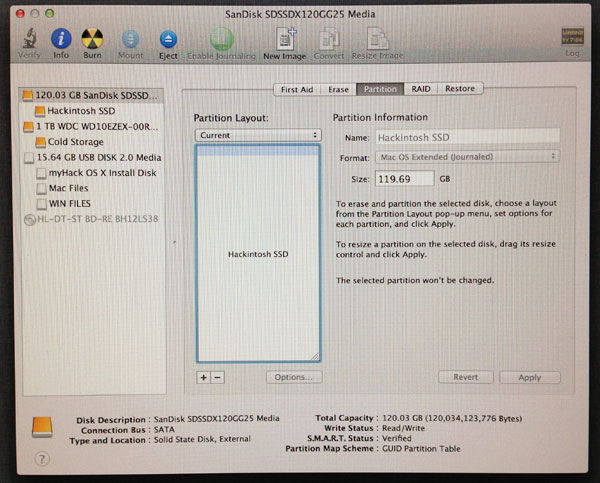
- The internal SSD needs to be formatted. From the menu bar, choose Utilities > Disk Utility…
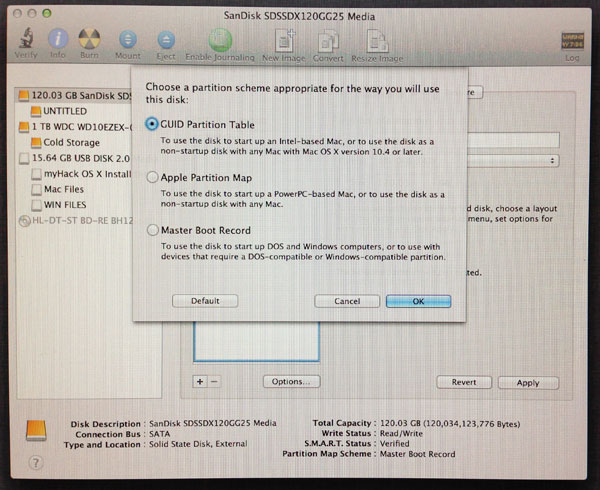
- Select the disk and click on the Partition tab. From the Partition Layout: menu, choose 1 Partition. Click on the Options… button below the partition box and select GUID Partition Table:
- Press OK to return to the main Disk Utility window and choose Mac OS Extended (Journaled) from the Format popup list. Name your drive and press the Apply button. Choose Partition when prompted. When done, your disk should look like this:
- Quit Disk Utility to return to the main installer. Briefly, the rest of the steps:
- Continue
- Agree
- Choose the disk ("Hackintosh SSD" in my example) from the list and press the Install button
- Installation should take about 15 minutes. myHack will ask you the following:
- "Do you want to use the generic Extra that comes with myHack or specify your own?"
Choose "Use Generic One" and press OK. - "Do you want to remove ApplePolicyControl.kext?"
Choose "Yes" to continue. - "Do you want to remove AppleTyMCEDriver.kext?
Choose "Yes" to continue. - "Do you want to remove AppleUpstreamUserClient.kext?"
Choose "Yes" to continue. - When complete, the system should restart automatically.
- Run through the rest of the standard Mountain Lion setup. You may be prompted to select a wireless network to get online immediately if your card is recognized - it is recommended to do this to more easily facilitate the remaining setup steps, especially since your ethernet port is not yet working!
- When Mountain Lion's setup assistant is complete, you should be brought to the Mac OS X desktop. You may now eject your USB thumb drive.
OS Post-Installation
- Select Apple Menu > About This Mac. You should see something similar to this:
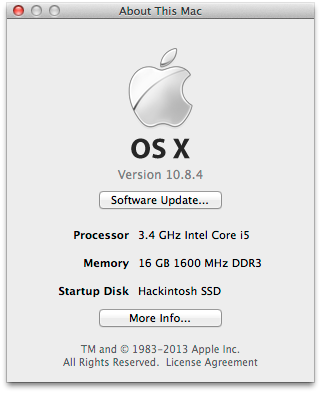
- Click on More Info… to double-check your hardware:

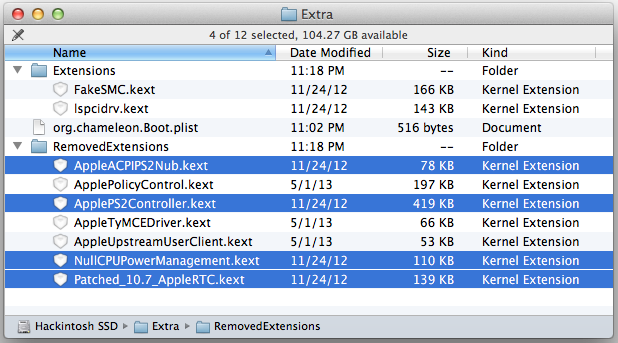
You'll notice that things might be a bit off. That's OK, this information will change very soon. - Navigate to your main hard drive root location and open the Extra folder. You should see these files, installed by myHack:

- Move the selected files to the RemovedExtensions folder, as they are not needed with our configuration and reboot. You will need to authenticate when you move them.
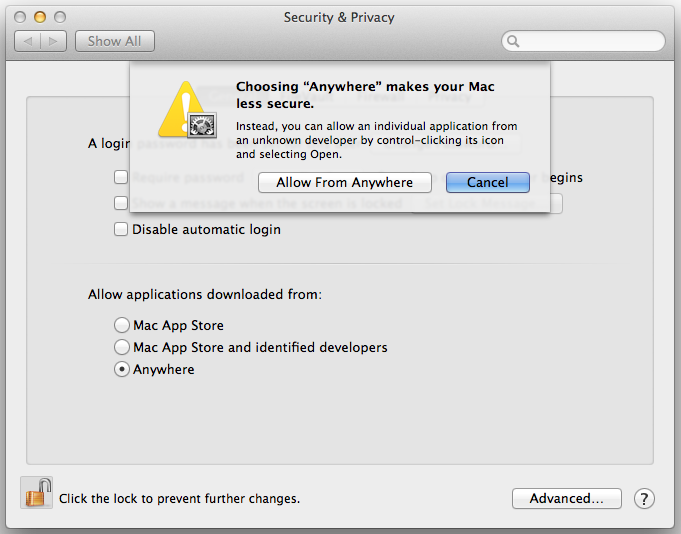
- Make a quick trip to System Preferences > Security & Privacy. Change the "Allow applications downloaded from:" setting to "Anywhere". If you're making a Hackintosh, you are should know where your applications are coming from and if you can trust them or not without Apple's security settings getting in the way:
- Open MultiBeast 5.3.1 and install these items:
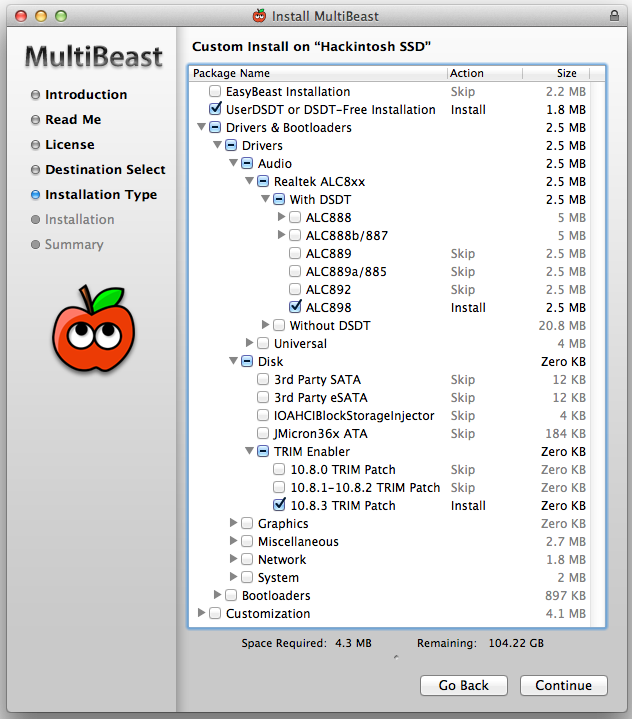
- UserDSDT or DSDT-Free Installation:
UserDSDT or DSDT-Free is a solution for those desktop systems who have a pre-edited DSDT on the desktop with an .aml extension or a motherboard that works without a DSDT. Installs your DSDT if found as DSDT.aml, a org.chameleon.Boot.plist with GraphicsEnabler=Yes, Apple Boot Screen, UseKernelCache=Yes, GenerateCStates=Yes, GeneratePStates=Yes and darkwake=0 kernel flag, MacPro3,1 smbios.plist with a unique serial number, Desktop power management hibernate mode and tonymacx86 black theme in /Extra. Installs FakeSMC.kext in /System/Library/Extensions. Installs Chimera v2.0.1 r2109 so the system will be bootable from the hard drive and ready for sleep with all hardware recognized in System Profiler. Patches /System/Library/Extensions/AppleRTC.kext to prevent CMOS resets. Does not include any Network or Sound drivers. - Drivers & Bootloaders > Drivers > Audio > Realtek ALC8xx > With DSDT > ALC898:
Replaces the current AppleHDA.kext in /System/Library/Extensions with a patched 10.8.3 AppleHDA.kext to enable full functionality for the Realtek ALC898 high-definition audio codec. Edits by toleda. Patches /Extra/DSDT.aml to replace layout-id 382 with layout-id 1. - Drivers & Bootloaders > Drivers > Disk > TRIM Enabler > 10.8.3 TRIM Patch:
Patches the 10.8.3 version of /System/Library/Extensions/IOAHCIFamily.kext/Contents/PlugIns/IOAHCIBlockStorage.kext to enable TRIM on non-Apple SSD drives. - Reboot your computer. You will notice that you now have an "Early 2008" Mac Pro instead of an iMac if you check About This Mac. This is due to an updated smbios.plist file in /Extra.
Fix: Ethernet Port
The onboard Broadcom BCM57781 chip is not natively supported in Mountain Lion.
Kext source: http://www.osx86.net/view/3089-broadcom_netlink_bcm57781.html
- Launch Kext Wizard and drag the IONetworkingFamily.kext file into the window. Make sure the destination is set to "Extra":
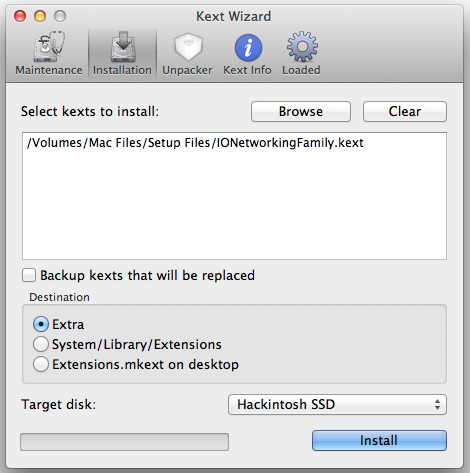
- Click the Install button and authenticate.
- You should get a message saying "Done / Selected tasks were finished." Quit Kext Wizard and reboot.
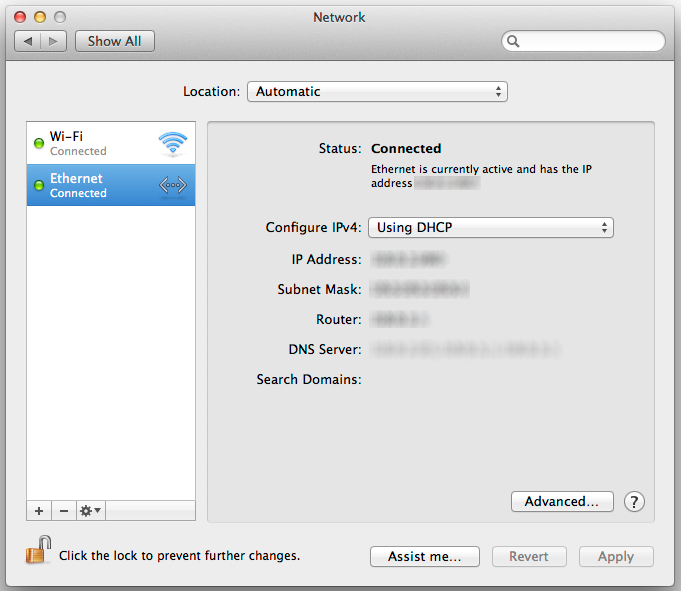
- After reboot, go to System Preferences > Network and click the
 icon and choose "Ethernet" from the Interface: drop-down list. NOTE: You may have to delete your Wi-Fi interface and add Ethernet first to make things work properly! If the Ethernet interface was successfully added, you should be able to establish a network connection:
DSDT Installation and Editing
A DSDT.aml file bridges the gaps between your hardware and OS X, and is stored in the /Extra folder.
MaciASL can be downloaded here: http://sourceforge.net/projects/maciasl/files/
Creating a DSDT using MaciASL: http://pjalm.info/creating_a_dsdt.php
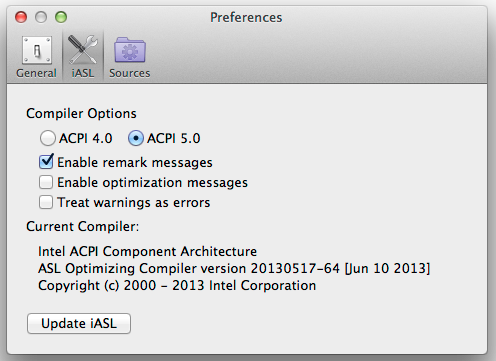
- Open MaciASL and go to Preferences from the menu bar.
- Click on iASL and make sure the ACPI 5.0 complier option is selected:
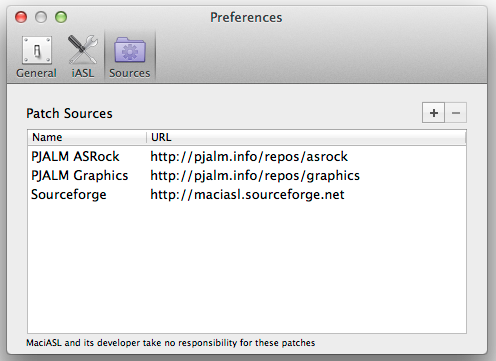
- Click the Sources button and add the PJALM sources to the Patch Sources list:
- Close and relaunch MaciASL.
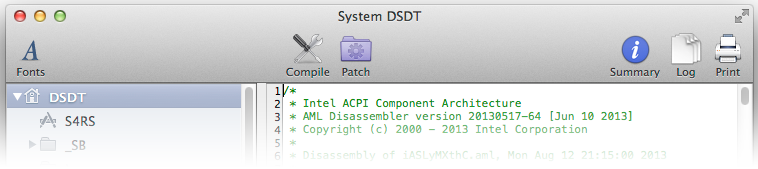
- When MaciASL launches again, your "clean" DSDT should load on the left column. MaciASL will show "System DSDT" in the title to indicate a clean DSDT. Click the purple Patch button in the top toolbar:
- When the patch window drops down, look for Z77E-ITX (your motherboard) in the PJALM ASRock list. Click it to to load the patch:
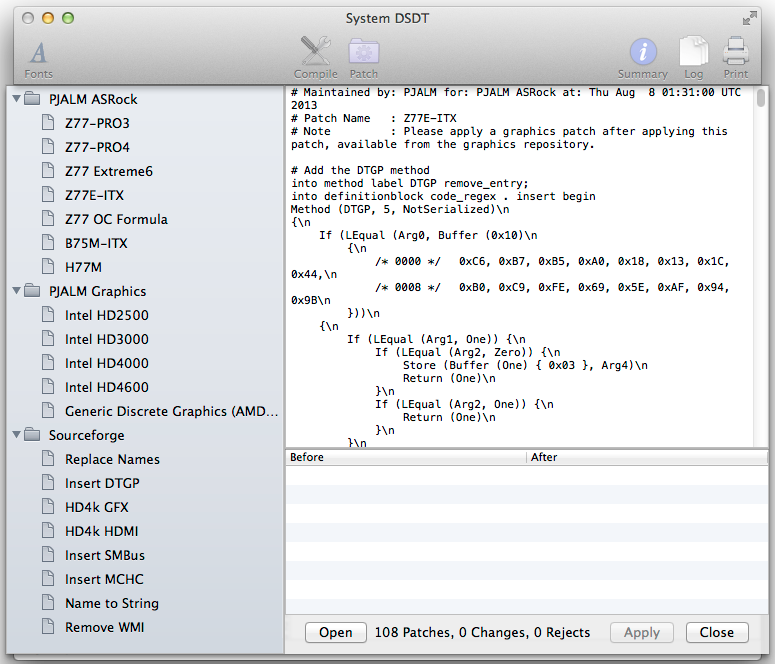
- Click Apply. The patch will be applied to your DSDT and the two text areas on the right should be cleared.
- Look for Intel HD4000 (your CPU's built-in graphics) in the PJALM Graphics list. Click it to load the patch:
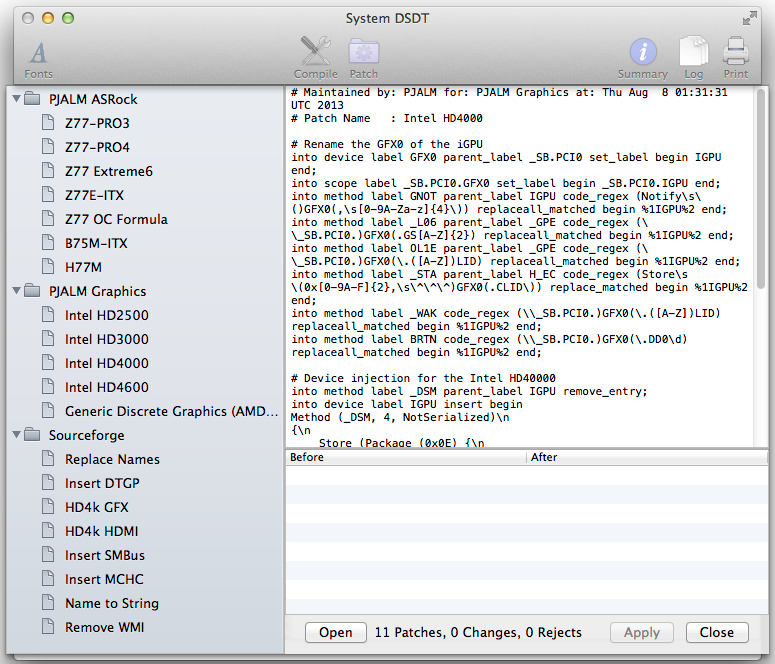
- Click Apply. The patch will be applied to your DSDT and the two text areas on the right should be cleared. Click Close.
- Click the Compile button on the top toolbar.
- Close the window and MaciASL will prompt you to save the changes. For the file format, make sure ACPI Machine Language Binary is selected, and save the file as DSDT.aml and save to somewhere convenient, such as the desktop:
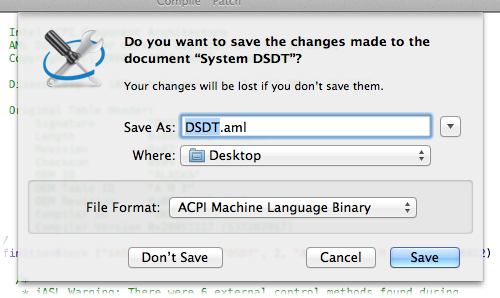
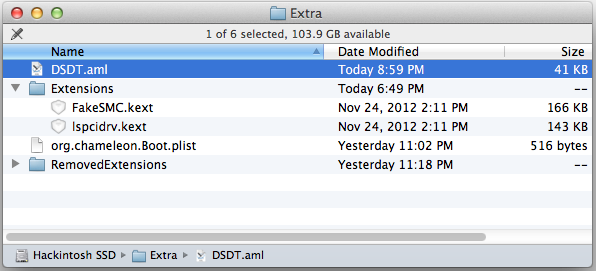
- Move the DSDT.aml file to your /Extra folder. You will have to authenticate. Here is the final destination of the file:
- Reboot your computer.
Fix: USB 2.0 Devices in USB 3.0 Ports
The Intel Z77 USB ports are supported natively in Mountain Lion, with the following exception: USB 2.0 storage devices do NOT work in USB 3.0 ports. The DSDT file already helped to fix this. The ASMedia ports require two kexts.
- Launch Kext Wizard and drag the CalDigitUSBxHCI.kext and CalDigitFastIO.kext files into the window. Make sure the destination is set to "Extra":
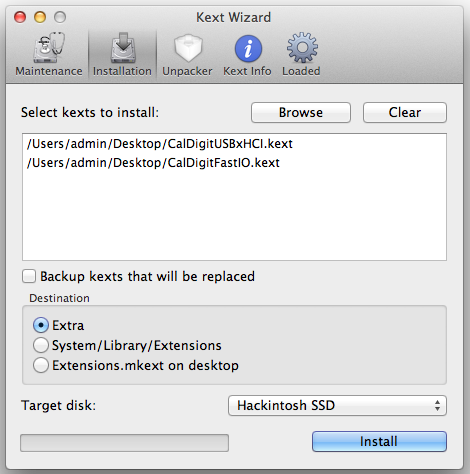
- Click the Install button and authenticate.
- You should get a message saying: "Done Selected tasks were finished." Quit Kext Wizard and reboot.
Fix: Automatic Sleep
Putting your computer to sleep manually should work by now, but if you have your computer set to sleep after a certain amount of time (System Preferences > Energy Saver), it may not fully work. Follow these steps to fix:
- Copy org.chameleon.Boot.plist to the desktop for easy editing.
- Open org.chameleon.Boot.plist in TextEdit.
- Find where it says "darkwake=0" and change it to "darkwake=1":
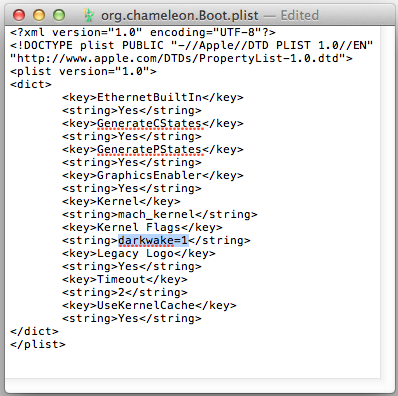
- Save, copy to the original location in /Extras, reboot and test by setting the sleep time to 1 minute. Keep in mind that Auto Sleep is more finicky than manual sleep, and can take several minutes longer to sleep!
Remember that Auto Sleep will not work if you have a USB storage device that is NOT self powered (ie. it is powered by the USB port only.
If you still have problems with Auto Sleep, open Terminal and type "pmset -g assertions" to see what is hanging you up.
Fix: Orange Hard Drive Icons
If you prefer to show hard disks on the desktop like me, you may see that they show up as an orange removable drive. This is because the PC-TU200 case features hot-swappable hard drive bays, which is cool, but if you want to avoid accidentally ejecting a drive, you may want to disable hot-swapping for that drive. You can adjust this on a drive by drive basis…
- Reboot and enter the UEFI setup.
- Navigate to Advanced > Storage Configuration and select the disk(s) you want to display as internal drives.
- Change the Hot Plug setting from "Enabled" to "Disabled".
- Escape, save and exit, and boot up the computer.
![]()
NOTE: Make sure to disable the Hot Plug feature for your optical drive. Otherwise, DVD Player will give you an error message and not launch with the following error:
There was an initialization error. A valid DVD drive could not be found. [-70012]
I plan on posting more information here soon, after a month of solid use, I'm very happy with the results. It's snappy and I love the case design.
What Works So Far
- Wi-Fi
- Ethernet
- Manual sleep / wake
- Auto sleep / wake (USB devices that are not self powered will prevent automatic sleeping)
- Intel HD 4000 video: 2560x1600 via DisplayPort
- Intel HD 4000 video: 1280x1024 via DVI
- Intel HD 4000 video: Dual monitor support (DVI & DisplayPort)
- Intel HD 4000 video: 1080P via HDMI
- Onboard audio: 2.1 stereo + subwoofer via black 1/8" jack
- Microphone port (onboard)
- Microphone port (case front)
- USB 2.0 and USB 3.0 ports all work (with USB 2.0 devices; I have no USB 3.0 devices to test with)
- CD burning
Untested
- Speedstep
- Wake on Lan from Sleep & non-OSX Power Off states
- E-SATA port (onboard)
- CIR header on motherboard
- Optical audio out
Not Working
- Card reader that is built into my Dell U3011 display (more details here)
- E-SATA port (case; cable disconnected due to lack of available SATA ports)
- DVD burning?
- HDMI output to 720P?
- Built-in Wi-Fi module
- PS/2 port (LOL)